ILS Approaches - Download zip file of this lesson here (400k)
Today we’ll be talking about the most common precision approach, the ILS approach. It uses both a localizer and a glideslope for guidance. Our nav radios can only tune the localizer frequency and we then receive the glideslope as well. So, when preparing to fly an ILS, we tune the localizer frequency in the nav radio. The ILS is located at the airport and they are runway-dependant, so large airports may have several ILS frequencies. So, now that we know what ILS approaches are, let’s brief our chart and then go flying...
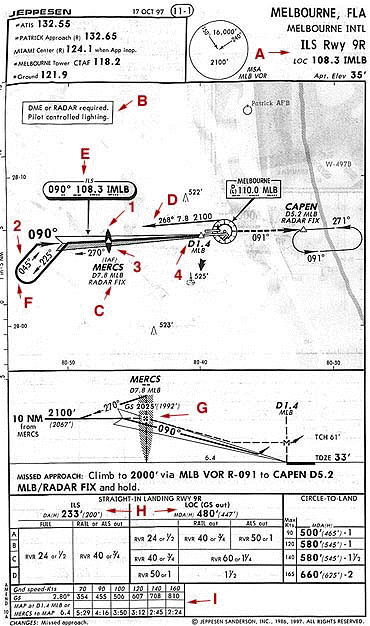
Since we’ve already gone over chart symbology, I’ll just touch lightly on most of these things. "A" tells us that we’re going to be doing the ILS Rwy 9R approach at Melbourne, FLA. Because the ILS is going to take us directly to a particular runway, we will always see the runway number in the approach identifier. We also see that the primary navaid is the lacalizer(IMLB), it’s frequency being 108.3. "B" points to a chart notification, telling us that we must have DME or radar(ATC, not onboard) in order to fly this approach. It also tells us that there is pilot-controlled lighting for this runway. The first question I always ask myself is "Why do I need DME or radar?". The most common reason deals with being able to reach the IAF. If you look at "C" you’ll see that the IAF is at MERCS, the outer marker. Well, since a marker just puts out a signal to our marker lights and aural system, we have no way to navigate to it directly. "D" shows us a feeder route from the VOR, which we CAN navigate to directly, which will take us to MERCS if we fly the 268 radial at 2100ft MSL until 7.8DME. So, you can see that we’ll have to have DME to reach MERCS via the feeder route or get radar vectors from ATC. Otherwise, we have no way to start the procedure. The next question I ask myself is "Why don’t they just make the VOR the IAF then?" Well, there’s no good answer. You’ll have to call the FAA and get their reason if you really want it. "E" shows us our localizer frequency and front course heading.You’ll notice this ILS does NOT have DME(otherwise it would say "ILS DME"), so if you use it in X-Plane(like I will for this example), you’re cheating. "F" shows us our procedure turn. "G" tells us a few things. One, you see the maltese cross which represents the FAF. However, this is only if you were doing this approach as localizer-only. For an ILS approach, the FAF is wherever glideslope intercept occurs. You can see that at "G" it says "GS 2025". That means that if we are on glideslope, we should be at 2025ft MSL when we pass MERCS. You can see that glideslope intercept actually occurs a bit before MERCS. The line with the "090?" through it represents the glideslope, the dashed line indicated the localizer-only approach procedure, the MAP being at 1.4DME from the VOR. "H" shows us our approach minimums. Our Decision Height(DH) for the ILS is 233ft MSL, the MDA is 480ft MSL for localizer-only. Our visibility minimums are RVR of 2400ft or 1/2 SM visibility. "I" shows us our times for the localizer-only MAP. It also shows us our proper descent rate to maintain the glideslope for several groundspeeds. So, if we’re doing 90kts, we should descend at 455ft/min in order to maintain the glideslope. OK, now that we’ve briefed our plate, let’s do this...
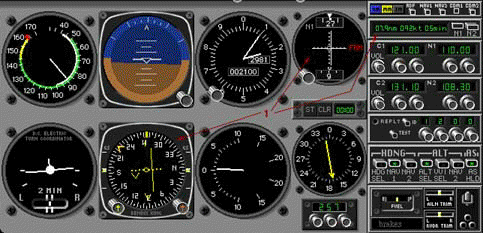
Today’s weather is ceiling 350ft overcast, visibility 1 mile. We’ll be doing the full procedure, starting at the VOR. So, what we’re going to do is take off from Melbourne, climbing to 2100ft, and request the full ILS 9R approach. At that point, Center will say "9246F proceed direct Melbourne VOR, cleared full ILS 9R approach, maintain 2100 until established, contact tower 118.2 when procedure turn inbound". So, now we’ve tuned in MLB and turned the needle until it center TO the VOR. We’re level at 2100ft and proceeding to the VOR. I’ll use NAV1 to fly the feeder route and set NAV2 to the localizer. After the procedure turn, I’ll tune NAV1 to the localizer as well so you can see the procedure on both instruments. Normally, I would leave it set to the VOR frequency so I could use its DME. We see that our course for the feeder route is 268 degrees FROM MLB, so as we pass over the VOR, we will turn the OBS to set 268 on top and turn to intercept the course. We’ll continue on this course until we get to 7.8DME. This may not take us directly over the beacon since it is designed to be aligned with the localizer, not the VOR radial, so when we reach 7.8DME, hopefully we’ll hear the beacon as well, but we might not. Also, let’s get those flaps out.
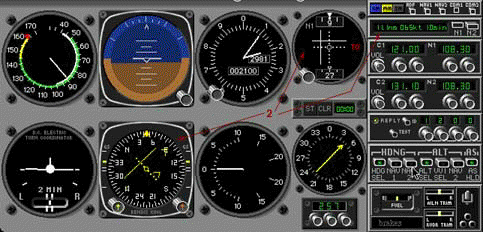
Now, we’ve got 10NM from MERCS to do the procedure turn. Since we’re already at 2100ft, I’m only going to go out 1NM from MERCS before I start my turn. Now, you can see at "C" that the first turn is to a heading of 225 degrees. So, when I get to 8.7DME from MLB, I’ll make a turn to 255 degrees and start my timer. We want to fly the procedure turn outbound for 1 minute. When 1 minute is up on our timer, we’ll start a 180 degree turn to a heading of 045 degrees and then fly inbound. MAKE SURE to make standard rate turns(wings set on the turn index line on the turn coordinator) or else the procedure turn won’t work out. At this point, we’re inbound on the procedure turn, so it’s time to call the tower and report where we are. The tower will then say "9246F roger, report MERCS". As we’re flying inbound, I’ll now set both NAV instruments to the inboudn course of 090 degrees.
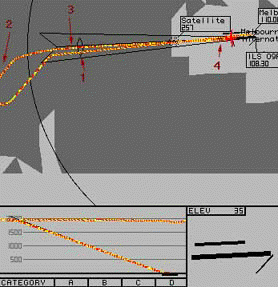
As we near our course, the needle will start to center and we’ll start a turn to intercept our course. We can see that we are below the glideslope at this point, which is good because we want to intercept from below. As we near MERCS, the glideslope needle will slowly move down until we’re on glideslope. At this point, we’re established on the glideslope, so we may begin descending(455ft/min approx. see "I"). We’ll also be hitting MERCS, so you’ll see and hear the marker beacon. We said that glideslope intercept is the FAF, so let’s drop the gear. We should also start our timer. Even though we don’t need time for an ILS approach, if we were to lose both the glideslope and the DME, we would need a way to identify the MAP. We’ll be doing the approach at 90kts, so looking at "I", we can see that it should take us 4:16 to reach the MAP. Finally, we need to call the tower at which point they will clear us to land.

Now we’re done with communicating and configuring and all of our concentration is on flying. We’ve got two needles to watch as well as the other instruments, so keep your eyes moving. Pitch for your glideslope and use power to hold your airspeed. Use very small changes, remember, the localizer and glideslope are very sensitive and get even more so as we get closer. Our DH is 233ft MSL. Once I hit 1000ft above the DH, I start calling out altitudes at every hundred feet to remind myself(800 for 233, etc.). Once we hit the DH, we take a quick look up for the runway environment. If it’s there, we keep on going down, If not, we would immediately begin the missed approach upon reaching the MAP, calling the tower to let them know we’re going missed. In this case however, we’ve got the runway just in sight, so we’ll continue the approach and make a normal landing.

If you’ve got a good handle on your aircraft, ILS approaches aren’t very difficult. It gets very touchy down near the runway, but if you’ve got the plane stabalized and you remember to make very small corrections, you’ll be in good shape. Have fun!